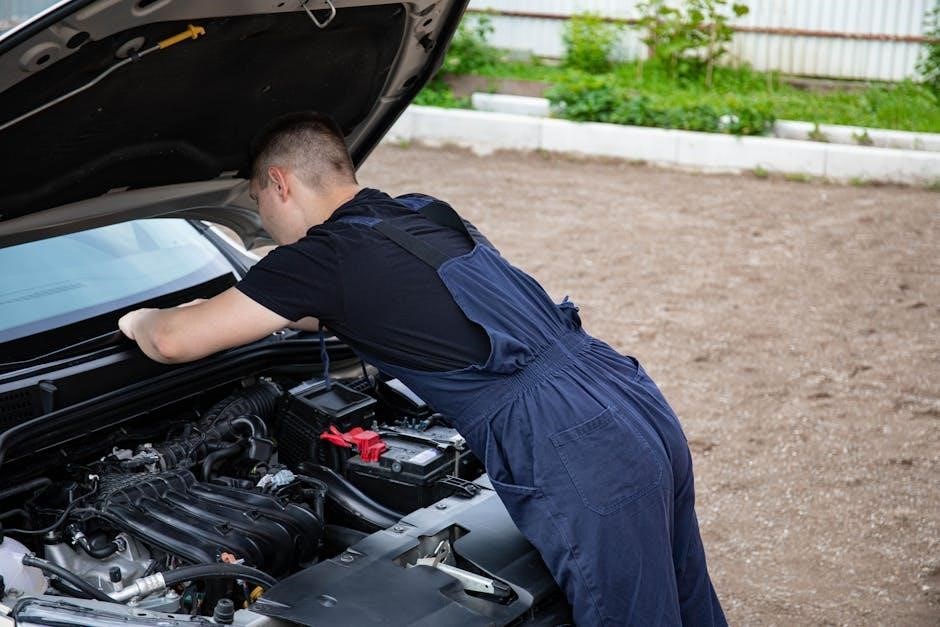
Fisher & Paykel DishDrawer Manual Troubleshooting: A Comprehensive Guide
Navigating Fisher & Paykel DishDrawer issues requires understanding error codes‚ drainage‚ lid motors‚ and spray arms – this guide offers detailed troubleshooting steps and resources.
Understanding Your DishDrawer Model
Fisher & Paykel DishDrawers‚ renowned for their innovative design‚ come in various models – freestanding‚ integrated‚ and double-drawer configurations. Each model possesses unique characteristics‚ impacting troubleshooting approaches. Identifying your specific model is paramount for accurate diagnosis and repair. Models ending in ‘9’ have distinct fault code behaviors. Understanding the differences between DDA and DDC models is crucial‚ as error interpretations vary. Familiarize yourself with the user guide specific to your DishDrawer; it details features‚ operation‚ and preliminary troubleshooting steps. Knowing whether your unit is pre-finished‚ and its manufacturing date (post-Mem741743)‚ affects LED display code interpretation.
Identifying the Model Number
Locating your Fisher & Paykel DishDrawer’s model number is the first step in effective troubleshooting. This crucial identifier unlocks access to the correct manual‚ parts diagrams‚ and specific error code information. Typically‚ the model number is found on a sticker located inside the DishDrawer door‚ along the side frame‚ or on the rear panel. Common prefixes include DD603‚ DD24DCTX7‚ and variations like DD36DD603. Note the complete alphanumeric code‚ as even slight differences signify distinct models. Having this number readily available when seeking support or ordering replacement parts streamlines the process‚ ensuring compatibility and accurate solutions.
Accessing the Fault Code Display
Fisher & Paykel DishDrawers communicate issues through a fault code display‚ typically utilizing LED indicators. For integrated models‚ or those with prefinished products after Mem741743‚ the LED display column is the primary source. To read the code‚ observe the flashing pattern – each code represents a specific problem. Some models may require a specific button press (like the reset button) to initiate the display. Refer to your DishDrawer’s manual for the exact procedure. Documenting the code accurately is vital for targeted troubleshooting‚ enabling you to pinpoint the source of the malfunction efficiently.

Common Fisher & Paykel DishDrawer Error Codes
Frequent error codes include A6 (spray arm issues)‚ E5 (lid motor circuit fault)‚ and F1/F9 (drainage problems)‚ each signaling distinct malfunctions within the system.
Error Code A6: Spray Arm Issues
An A6 error code on your Fisher & Paykel DishDrawer typically indicates a problem with the spray arm functionality. This could stem from a loose spray arm installation‚ preventing proper water distribution during the wash cycle. Thoroughly check that the spray arms are securely attached and rotating freely.
Furthermore‚ obstructions within the spray arm nozzles are a common cause. Food particles or debris can block the jets‚ reducing water pressure and triggering the error. Inspect and clear any blockages. Finally‚ verify adequate water pressure reaching the dishwasher‚ as insufficient pressure can also contribute to an A6 error. Addressing these points should resolve the issue.
Error Code E5: Lid Motor Circuit Fault
The E5 error code signals a fault within the lid motor circuit of your Fisher & Paykel DishDrawer. This often points to an open circuit‚ specifically identified on pin 02‚ disrupting the lid’s operation. Careful testing of the lid motor circuit with a multimeter is crucial to pinpoint the exact location of the break.
Additionally‚ inspect the lid switch for proper functionality‚ as a faulty switch can prevent the motor from engaging. Ensure there are no visible signs of damage or corrosion. Addressing these electrical components is key to resolving the E5 error and restoring your DishDrawer’s operation.
Error Code F1/F9: General Drainage Problems
The F1 or F9 error codes on a Fisher & Paykel DishDrawer indicate a general drainage issue‚ preventing proper water removal after a wash cycle. This commonly stems from obstructions within the drain hose or a clogged drain pump filter. Thoroughly inspect the drain hose for kinks or blockages‚ ensuring a clear path for water flow.
Furthermore‚ carefully remove and clean the drain pump filter‚ removing any debris that may be hindering its function. Verify the proper functionality of the air gap‚ if installed‚ to prevent backflow. Addressing these drainage components is vital for resolving the F1/F9 error.
Decoding the Fault Code Chart
The manual’s fault code chart‚ accessible via the LED display‚ provides quick reference for diagnosing issues in Fisher & Paykel DishDrawers‚ post-MEM741743.
Locating the Fault Code Chart in the Manual
Finding the fault code chart within your Fisher & Paykel DishDrawer manual is crucial for effective troubleshooting. ManualsLib indicates that for the DD603 model‚ the chart resides on page 27. This chart serves as a quick reference guide‚ detailing various fault codes and their corresponding descriptions. For integrated models‚ or those manufactured after MEM741743‚ the LED display column within the chart is the primary source for identifying error codes.
Carefully review your specific model’s manual‚ as page numbers may vary. The chart typically presents codes in a structured format‚ allowing for easy lookup and interpretation. Understanding where to locate this vital information empowers you to diagnose and potentially resolve issues independently‚ before seeking professional assistance.
Interpreting LED Display Codes
Decoding the LED display on your Fisher & Paykel DishDrawer is key to understanding the error. The fault code chart‚ particularly relevant for prefinished products after MEM741743‚ translates these codes into understandable descriptions. These codes pinpoint the source of the problem‚ ranging from drainage issues (like F1/F9) to spray arm malfunctions (A6) or lid motor circuit faults (E5).
Remember to consult your manual’s chart for accurate interpretations. Adelaide Appliance highlights that understanding these codes allows for self-troubleshooting. Note that the specific code displayed directly correlates to a defined issue‚ guiding you towards the appropriate repair steps. Accurate interpretation is the first step towards a successful fix.
Understanding Prefinished Products After Mem741743
For Fisher & Paykel DishDrawers manufactured after the MEM741743 update‚ interpreting fault codes relies heavily on the LED display. Unlike older models‚ these units communicate errors directly through the display panel. ManualsLib emphasizes this change‚ noting the LED display column within the fault code chart becomes the primary diagnostic tool.
This means referencing the chart is crucial; the code shown on the LED screen corresponds to a specific issue. Understanding this system is vital for effective troubleshooting‚ as traditional methods may differ. Always consult the manual for the most accurate interpretation of codes on these newer DishDrawer models.

Troubleshooting Drainage Issues
Effective drainage troubleshooting involves checking the drain hose‚ inspecting the drain pump filter‚ and verifying proper air gap functionality for optimal performance.
Checking the Drain Hose for Blockages
Begin by disconnecting the power supply to your Fisher & Paykel DishDrawer for safety. Locate the drain hose‚ typically connected under the sink or to a garbage disposal. Carefully detach the hose and inspect it visually for any kinks or obvious obstructions. Gently run water through the hose to identify blockages; a stubborn clog may require a flexible brush or wire to dislodge debris.
Ensure the hose isn’t crushed or bent‚ restricting water flow. Also‚ check the connection points for buildup. If the blockage persists‚ consider disconnecting the hose from the drain and flushing it with a stronger water pressure‚ taking care to avoid damaging the hose itself. Reconnect securely and test the DishDrawer’s drainage function.
Inspecting the Drain Pump Filter
Prioritize safety by disconnecting power before accessing the drain pump filter in your Fisher & Paykel DishDrawer. The filter’s location varies by model‚ often found at the base of the dishwasher’s interior. Carefully remove the filter assembly‚ noting its orientation for correct reinstallation. Inspect the filter for food particles‚ glass shards‚ or other debris causing a blockage.
Thoroughly clean the filter under running water‚ using a brush to remove stubborn residue. Examine the pump housing for any trapped objects. Reassemble the filter securely‚ ensuring a tight seal to prevent leaks. A clean filter ensures efficient drainage and prevents recurring error codes related to drainage issues.
Verifying Proper Air Gap Functionality
Confirm the air gap‚ typically located on the sink‚ isn’t clogged – this prevents wastewater from flowing back into the dishwasher. Remove the air gap cover and inspect the internal components for debris or buildup. Clear any obstructions with a small brush or toothpick‚ ensuring unrestricted airflow.
Test the air gap by briefly running water into the sink while observing the dishwasher drain hose connection. Proper functionality means water flows freely without backing up. A malfunctioning air gap can cause drainage problems and trigger error codes. Regularly cleaning the air gap is crucial for optimal dishwasher performance and preventing potential issues.

Addressing Lid Motor Problems (E5 Error)
The E5 error signals a lid motor circuit fault; testing the circuit and inspecting the lid switch and pin 02 are vital steps.
Testing the Lid Motor Circuit
To effectively test the lid motor circuit when encountering an E5 error‚ a multimeter becomes an indispensable tool. Begin by disconnecting power to the DishDrawer to ensure safety. Access the wiring connections for the lid motor‚ carefully noting their positions for reassembly. Using the multimeter in continuity mode‚ check for a complete circuit between the power supply and the lid motor.
An open circuit‚ indicated by a lack of continuity‚ confirms a break in the wiring or a faulty component. Specifically‚ investigate pin 02‚ as an open circuit here is frequently implicated in E5 errors. If continuity exists‚ proceed to test the voltage reaching the motor when the lid is activated‚ verifying it aligns with the manufacturer’s specifications. Remember to consult the service manual for precise voltage readings and wiring diagrams.
Checking for Open Circuits on Pin 02
Pin 02 is a critical point of investigation when diagnosing an E5 error – a lid motor circuit fault. Utilizing a multimeter set to continuity mode‚ disconnect power to the DishDrawer first for safety. Locate the connector associated with the lid motor and carefully identify pin 02. Test for continuity between pin 02 and its corresponding ground connection.
A lack of continuity signifies an open circuit‚ indicating a broken wire‚ corroded connection‚ or a faulty component within the lid motor assembly. Visually inspect the wiring harness for any obvious damage. If the wiring appears intact‚ further testing of the lid motor itself may be necessary. Remember to consult the DishDrawer’s service manual for precise pinout diagrams and troubleshooting guidance.
Inspecting the Lid Switch
The lid switch is a crucial safety component‚ preventing operation when the DishDrawer lid isn’t securely closed. Begin by visually inspecting the switch for any physical damage or obstructions. With the power disconnected‚ manually operate the switch to confirm it’s moving freely. Use a multimeter in continuity mode to test the switch’s functionality.
When the lid is closed (switch activated)‚ the multimeter should indicate continuity. An open circuit suggests a faulty switch requiring replacement. Ensure proper alignment of the lid and switch mechanism. A misaligned switch can prevent proper closure and trigger the E5 error. Refer to the service manual for the exact location and testing procedures for your specific model.

Resolving Spray Arm Related Errors (A6 Error)
An A6 error indicates spray arm issues; check for proper installation‚ obstructions‚ and adequate water pressure to resolve the problem efficiently.
Ensuring Proper Spray Arm Installation
Correct spray arm installation is crucial for optimal dishwasher performance. Begin by verifying the spray arm is securely attached to its mounting point within the DishDrawer. Ensure it rotates freely without any resistance‚ indicating it’s not obstructed or improperly seated. A loose spray arm can trigger an A6 error code‚ as it disrupts water distribution.
Inspect the spray arm’s connection points for any damage or wear. Damaged clips or connectors can prevent a secure fit. If components are damaged‚ replacement is necessary. Refer to the Fisher & Paykel manual for specific installation diagrams and torque specifications. Proper alignment ensures water reaches all areas of the dishwasher‚ effectively cleaning dishes.
Checking for Obstructions in the Spray Arms
Regularly inspect the spray arms for blockages caused by food particles or debris. Remove the spray arms and carefully examine each nozzle for obstructions. Use a small toothpick or wire to gently clear any blockages‚ ensuring not to enlarge the nozzle openings. Clogged nozzles reduce water pressure and cleaning effectiveness‚ potentially leading to an A6 error.
Pay close attention to the underside of the spray arms‚ where food remnants often accumulate. Thoroughly rinse the spray arms under running water after cleaning. Verify that water flows freely from all nozzles. If obstructions persist‚ consider a deeper cleaning with a vinegar solution to dissolve mineral deposits.

Verifying Water Pressure
Insufficient water pressure can significantly impact DishDrawer performance‚ triggering error codes like A6. Begin by confirming that the water supply valve is fully open. Check other faucets in your home to ensure adequate overall water pressure isn’t compromised. A pressure gauge can provide a precise reading; ideally‚ it should be within the manufacturer’s recommended range.
Inspect the water inlet valve for kinks or blockages in the supply hose. If pressure remains low‚ the inlet valve itself might be faulty and require replacement. Reduced pressure hinders spray arm function‚ leading to incomplete cleaning and potential error code activation. Ensure proper water flow before proceeding with other troubleshooting steps.

General Troubleshooting Steps
Simple resets and power cycles often resolve minor glitches. Verify the water inlet valve functions correctly‚ ensuring adequate water supply for optimal dishwasher operation.
Resetting the DishDrawer
Attempting a reset is a foundational step in troubleshooting many Fisher & Paykel DishDrawer issues. This process can often clear temporary errors that may be causing malfunctions. Locate the reset button – its position varies by model‚ but it’s frequently found inside the DishDrawer‚ often near the control panel or the upper rack. Press and hold the reset button for approximately three to five seconds.
Observe if the DishDrawer responds by initiating a new cycle or displaying a different error code. If the reset doesn’t resolve the problem‚ proceed to power cycling the unit. Remember to consult your specific model’s manual for precise reset button location and instructions‚ as variations exist across different DishDrawer series.
Power Cycling the Unit
If resetting doesn’t resolve the issue‚ power cycling offers a more comprehensive reset. Begin by turning off the DishDrawer. Then‚ locate the circuit breaker that controls the dishwasher and switch it off. Allow at least 60 seconds for all residual power to dissipate from the system – this ensures a complete reset of the electronic control board.
After the waiting period‚ switch the circuit breaker back on and power on the DishDrawer. Observe if the error has cleared and the unit operates normally. Power cycling effectively restarts the dishwasher’s internal systems‚ potentially resolving software glitches or minor electrical inconsistencies.
Checking the Water Inlet Valve
Insufficient water supply is a common cause of DishDrawer malfunctions. Begin by verifying the water supply is fully turned on to the dishwasher. Next‚ inspect the water inlet valve itself‚ located where the water supply line connects to the unit. Ensure it isn’t kinked or blocked.
A faulty inlet valve may not open properly‚ restricting water flow. Use a multimeter to test the valve’s solenoid for continuity; a lack of continuity indicates a failed valve requiring replacement. Always disconnect power before performing electrical tests for safety.
Advanced Troubleshooting
For complex issues‚ utilize a multimeter to test circuits‚ identify faulty sensors‚ and gain insight into the control board’s functionality for repair.
Using a Multimeter for Circuit Testing
Employing a multimeter is crucial for diagnosing electrical faults within the DishDrawer. Begin by safely disconnecting power to the unit. Set the multimeter to measure voltage‚ then test key components like the lid motor circuit‚ checking for continuity and voltage levels as specified in the service manual.
Specifically‚ when addressing an E5 error‚ verify voltage at pin 02 to identify open circuits. Resistance measurements can pinpoint faulty sensors or wiring. Always refer to the wiring diagram within the manual for correct testing points and expected values.
Caution: Incorrect multimeter usage can cause further damage or pose a safety risk. If unfamiliar with electrical testing‚ consult a qualified appliance technician.
Identifying Faulty Sensors
Pinpointing faulty sensors within the DishDrawer often requires a systematic approach‚ aided by a multimeter. Common culprits include temperature sensors‚ water level sensors‚ and turbidity sensors. Use the multimeter to check for correct resistance values‚ comparing readings against the specifications detailed in the service manual.
Anomalous readings – infinite resistance when continuity is expected‚ or vice versa – indicate a failed sensor. Visually inspect sensors for physical damage or corrosion. Refer to the wiring diagram to locate sensor connections and ensure proper testing points.
Remember‚ sensor failures can manifest as various error codes‚ so correlating sensor readings with displayed faults is essential for accurate diagnosis.
Understanding the Control Board
The control board serves as the DishDrawer’s central nervous system‚ interpreting sensor data and orchestrating operations. Troubleshooting often involves visually inspecting the board for burnt components‚ swollen capacitors‚ or damaged traces. A multimeter is crucial for testing voltage levels and continuity on key circuits.
Identifying faulty relays or triacs requires understanding the board’s schematic. Be cautious when probing live circuits; disconnect power before performing extensive testing. Control board failures can mimic various error codes‚ making accurate diagnosis challenging.
Replacement is often necessary for irreparable boards‚ ensuring compatibility with the specific DishDrawer model.
Resources and Manuals
Access official Fisher & Paykel support‚ ManualsLib for DD603 manuals‚ and Adelaide Appliance guides for comprehensive troubleshooting assistance and detailed documentation.
Fisher & Paykel Support Website
The official Fisher & Paykel support website is an invaluable resource for DishDrawer owners facing troubleshooting challenges. It provides direct access to a wealth of information‚ including downloadable manuals for various models‚ frequently asked questions (FAQs) addressing common issues‚ and helpful video tutorials demonstrating repair procedures. Users can often find specific solutions tailored to their DishDrawer’s error codes and symptoms.
Furthermore‚ the website offers a contact form or live chat option to connect directly with Fisher & Paykel’s customer support team for personalized assistance. This is particularly useful for complex problems or when needing clarification on diagnostic steps. Registration of your appliance may also unlock additional support features and warranty information‚ ensuring a streamlined troubleshooting experience.
ManualsLib for DishDrawer DD603
ManualsLib hosts a comprehensive archive of user manuals‚ service manuals‚ and documentation for the Fisher & Paykel DishDrawer DD603 model. This platform is particularly useful for accessing detailed fault code charts‚ often found on page 27 of the service manual‚ providing descriptions for each error code to aid in diagnosis. Users can download these manuals free of charge‚ offering a convenient alternative to purchasing physical copies.
The DD603 manual on ManualsLib details troubleshooting steps‚ parts diagrams‚ and wiring schematics‚ empowering DIY repairs. It’s a valuable resource for understanding the DishDrawer’s internal components and identifying potential issues. Searching specifically for “fault codes chart” within the document quickly locates essential diagnostic information.
Adelaide Appliance Troubleshooting Guides
Adelaide Appliance provides a dedicated DIY troubleshooting guide for Fisher & Paykel dishwashers‚ including both freestanding and Double DishDrawer models. Their resource breaks down common error codes‚ detailing the symptoms associated with each and offering practical self-repair tips. This guide simplifies complex issues‚ making it accessible for homeowners without extensive appliance repair experience.
The website focuses on decoding error messages‚ helping users pinpoint the source of the problem. It’s a valuable starting point for diagnosing issues before contacting a professional. Adelaide Appliance’s approach emphasizes understanding the error’s meaning to facilitate effective troubleshooting and potential fixes‚ saving time and repair costs.